
Boxes can be obtained from Atlas repos , from whatever other repos or created by ourselves with Packer or manually.
Please pay attention that almost all boxes are OK with VirtualBox , but only some can be used with other providers like Parallels, Hyper-V, AWS, etc.
Boxes are stored separately from VMs, in ~/.vagrant.d and during VM deploy process box is cloned to hypervisor default location.
You can download box from Atlas repo using links or short names with vagrant box add command:
vagrant box add hashicorp/precise64
Don’t be afraid of names like precise64 , just see description – https://atlas.hashicorp.com/hashicorp/boxes/precise64
You can list boxes that are available locally with command vagrant box list:
![]()
I’ll use my own boxes because of security and compliance and I’ll create them manually.
Here’re general steps to build our own vagrant box running Windows Server 2016 TP5:
1. Create a new VM and disable sharing between host OS and VM, USB, Audio and all other irrelevant options;
2. Install guest tools, all required roles, features, updates and software;
3. Disable password complexity requirements to set well-known password for vagrant user; It can be done with Local Group Policy – (Computer Configuration > Windows Settings > Security Settings > Account Policies > Password Policy > Password must meet complexity requirements);
4. Disable Shutdown Tracker; It also can be done via Local Group Policy – (Computer Configuration > Administrative Templates > System > Display Shutdown Event Tracker);
5. Allow RDP connections; You can use my instruction;
6. Disable UAC and setup WinRM following vagrant guide;
7. Create user vagrant with well-known password vagrant and include it into a local administrators group (it’s not necessary step, you can use default Administrator or whatever other account).
So far we’re ready to build box from VM –
VirtualBox example:
vagrant package --base ws2016tp5 --output ws2016tp5.box
vagrant box add ws2016tp5 ws2016tp5.box --provider virtualbox
For Parallels we need to create metadata.json , which is a box catalog metadata file which is described in vagrant guide.
metadata.json exapmle:
[pastacode lang=”bash” user=”kagarlickijd” repos=”vagrant” path_id=”metadata.json” revision=”” highlight=”” lines=”” provider=”github”/]
Now we can create a box:
tar cvzf ws2016tp5.box ./ws2016tp5.pvm ./metadata.json
vagrant box add ws2016tp5 ws2016tp5.box --provider parallels
You can use Creating a Base Box article from Parallels for more details.
After you’ve created box, don’t forget to delete or rename your source Parallels VM.
For Hyper-V use vagrant guide, it will work fine on older Hyper-V servers (and only with first generation VMs), but not with 2016 because of different formats:

We’ll test our boxes now, and in order to do it we need to create folder for VirtualBox project and another folder for Parallels project.
Vagrantfile will be the same which is really nice:
[pastacode lang=”bash” user=”kagarlickijd” repos=”vagrant” path_id=”ws2016tp5PL/Vagrantfile” revision=”” highlight=”” lines=”” provider=”github”/]
We can make sure that vagrant up works for both VirtualBox and Parallels environments:

You can find more hypervisor-related options for VirtualBox here and for Parallels here.
And don’t forget about Hyper-V, options can be found here and here.
For Windows you can run sysprep:
C:\Windows\system32\sysprep\sysprep.exe /oobe /generalize /reboot /quiet /unattend:C:\Scripts\unattend.xml
I don’t like Windows welcome after sysprep, so I use answer file that disables it:
[pastacode lang=”bash” user=”kagarlickijd” repos=”vagrant” path_id=”unattend.xml” revision=”” highlight=”” lines=”” provider=”github”/]
Now our images are ready and we can upload them to Atlas repo:
1. If you don’t have Atlas account you can create new one for free – https://atlas.hashicorp.com/account/new
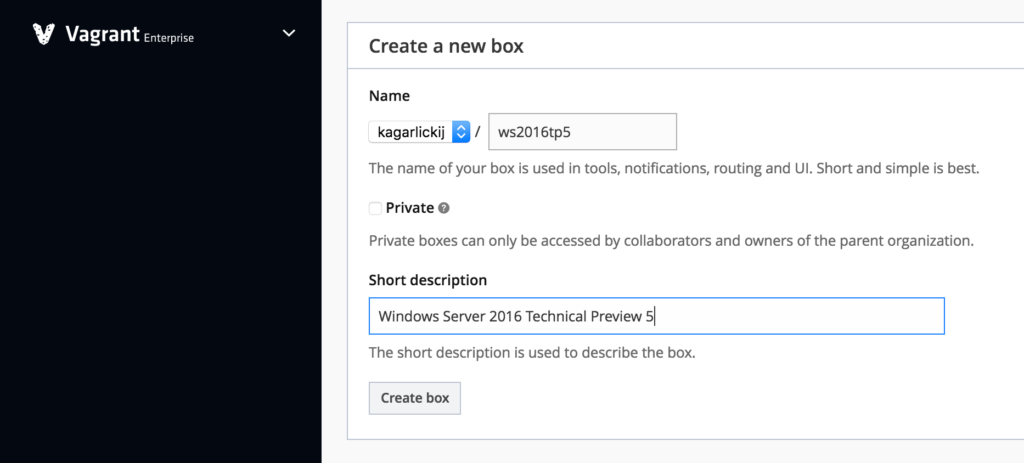
2. Create new box in Atlas repo:

3. Create first version of the box:

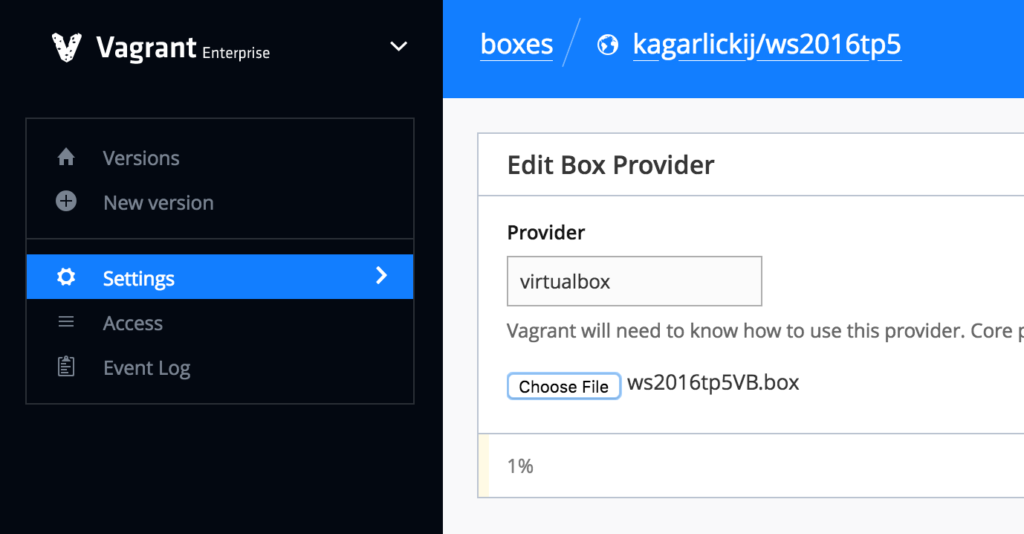
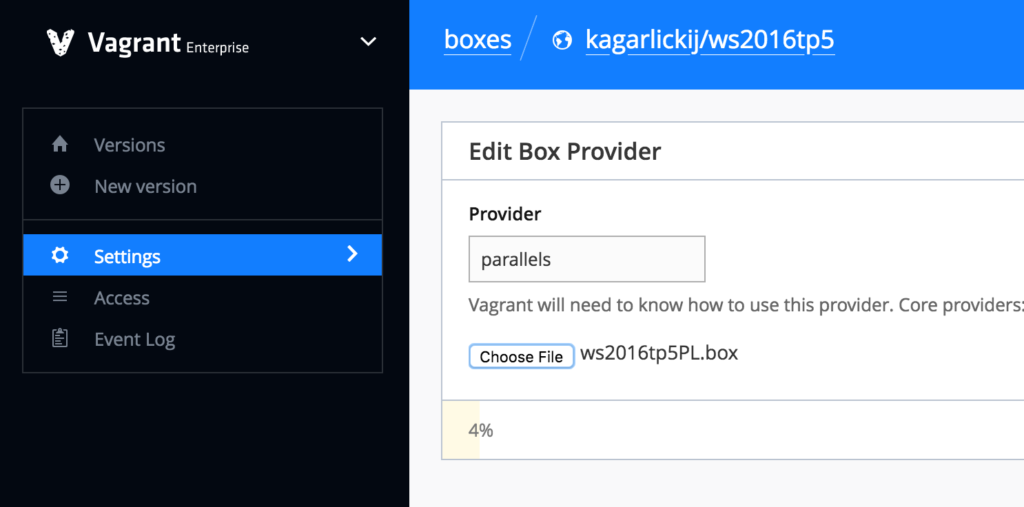
4. Create new providers and upload suitable box files for both providers (you can make .box from local unpacked box with vagrant box repackage command):
5. Now let’s release the first version:

6. We can download boxes to make sure that everything has been uploaded fine:

And the last part – we can start, stop and pause VMs not only from hypervisor GUI, but also from vagrant CLI:
vagrant global-status – will show current status of all active environments;
vagrant status – will show status of current environment (one or more VMs);
vagrant up – will create environment according to Vagrantfile;
vagrant reload – will delete current and create new environment according to Vagrantfile;
vagrant rdp – opens RDP to Windows-based VM;
vagrant powershell – opens PowerShell remote session, but only from Windows hosts;
vagrant ssh – will establish SSH session with Linux-based VM;
vagrant snapshot – will list, create, restore or delete VM snapshots;
vagrant suspend – will put environment on pause, so extra disk space will be required to store data from RAM;
vagrant resume – will turn on suspended environment;
vagrant halt – will shutdown environment;
vagrant destroy – will delete environment, but not Vagrantfile and shared stuff;

You can find a full list of CLI options in vagrant docs.